WSL環境に MySQL5.7 を導入する
Ubuntu22-04にMySQLを導入すると現在では最新版のMySQL 8.0以外のリポジトリが存在しないため、MySQL 5.7を強引に導入する手順について記載しておく。
インストール準備
-
作業用のディレクトリを作成
$ cd
$ mkdir mysql
$ cd mysql
-
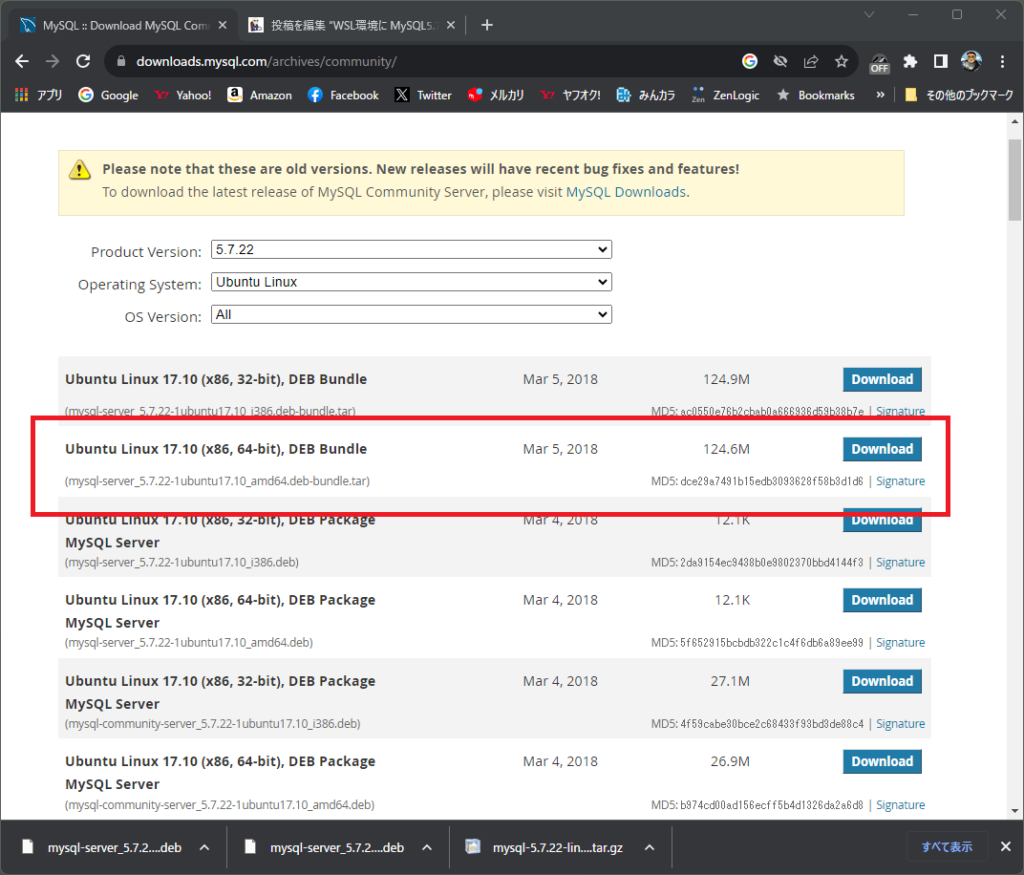
MySQL 5.7パッケージを公式サイトからダウンロード
https://downloads.mysql.com/archives/community/ から必要なファイルをダウンロードする。対象バージョンを5.7.22 バンドル版(64Bit)(tarファイル)を選んでおく。
-
ダウンロードしたファイルを作業ディレクトリにコピーする
$ cp /mnt/c/users/takan/Downloads/*.tar ~/mysql
-
前提となるパッケージを導入
$ sudo apt install libaio1
$ sudo apt install libtinfo5
$ sudo apt install libmecab2
$ sudo apt update
-
ダウンロードされたアーカイブを解凍する
$ tar xvf mysql-server_5.7.22-1ubuntu17.10_amd64.deb-bundle.tar
-
必要のないパッケージを削除
$ rm mysql-testsuite_5.7.22-1ubuntu17.10_amd64.deb
$ rm mysql-community-test_5.7.22-1ubuntu17.10_amd64.deb
$ rm rm mysql-community-source_5.7.22-1ubuntu17.10_amd64.deb
インストール作業
-
パッケージを起動しインストールを開始
$ sudo dpkg -i *.deb
-
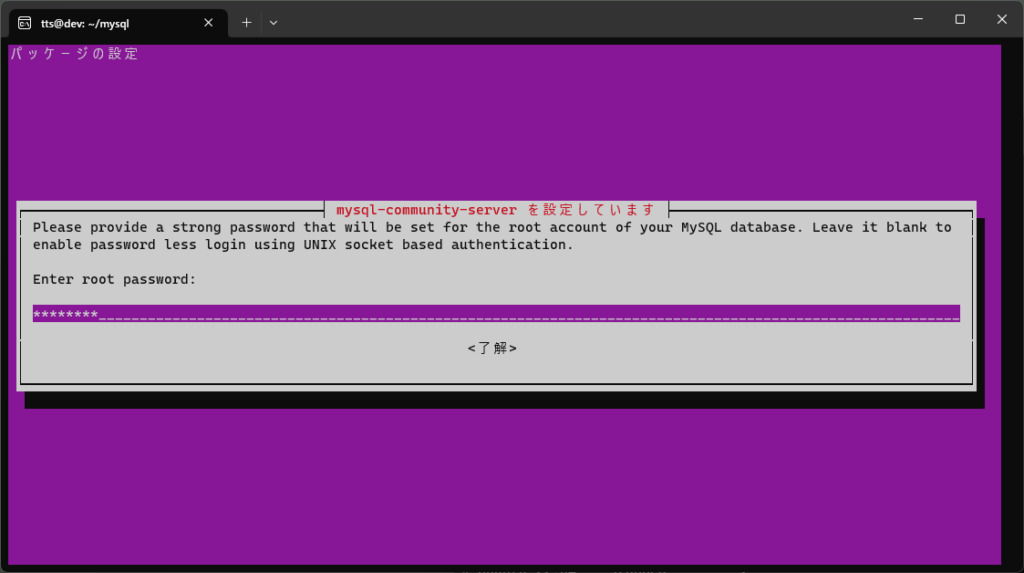
インストーラーが起動したら、DB管理者(root@localhost)のパスワードを入力
-
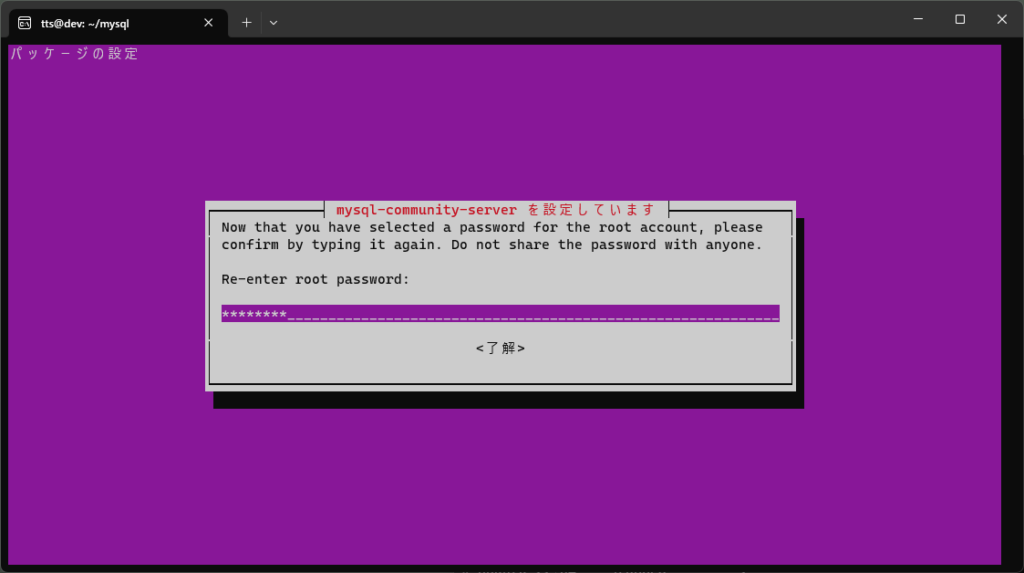
引き続き、DB管理者(root@localhost)のパスワードを再入力
-
インストーラーが終了したら一旦起動してみる。
root@localhostでログインした例$sudo mysql -u root -p Enter password: xxxxxx [enter] Welcome to the MySQL monitor. Commands end with ; or \g. Your MySQL connection id is 2 Server version: 5.7.22 MySQL Community Server (GPL) Copyright (c) 2000, 2018, Oracle and/or its affiliates. All rights reserved. Oracle is a registered trademark of Oracle Corporation and/or its affiliates. Other names may be trademarks of their respective owners. Type 'help;' or '\h' for help. Type '\c' to clear the current input statement. mysql>
-
バージョンを確認する
$ mysql --version
mysql  Ver 14.14 Distrib 5.7.22, for Linux (x86_64) using  EditLine wrapper
-
作業用ディレクトリを削除
$ rm -r ~/mysql
MySQLの設定を変更する
-
設定ファイルを編集するコマンド
$ sudo vi /etc/mysql/mysql.conf.d/mysqld.cnf
-
以下の行を末尾に追加する
port     = 3307
sql_mode = 'STRICT_TRANS_TABLES,NO_ENGINE_SUBSTITUTION'
max_allowed_packet = 16777216
-
サーバーを再起動する
$ sudo service mysql restart
アップグレード対象から除外する
-
アップグレード構成用の設定ファイルを作成
$ sudo vi /etc/apt/preferences.d/mysql
Package: libmysqlclient-dev
Pin: version 5.7.*
Pin-Priority: 1001

Package: libmysqlclient20:amd64
Pin: version 5.7.*
Pin-Priority: 1001

Package: libmysqld-dev
Pin: version 5.7.*
Pin-Priority: 1001

Package: mysql-client
Pin: version 5.7.*
Pin-Priority: 1001

Package: mysql-common
Pin: version 5.7.*
Pin-Priority: 1001

Package: mysql-community-client
Pin: version 5.7.*
Pin-Priority: 1001

Package: mysql-community-server
Pin: version 5.7.*
Pin-Priority: 1001

Package: mysql-server
Pin: version 5.7.*
Pin-Priority: 1001
-
リポジトリを更新する
$ sudo apt update
-
ポリシー情報を確認する
$ apt policy mysql-server
mysql-server:
  インストールされているバージョン: 5.7.22-1ubuntu17.10
  候補:               5.7.22-1ubuntu17.10
  バージョンテーブル:
     8.0.33-0ubuntu0.22.04.4 500
        500 http://archive.ubuntu.com/ubuntu jammy-updates/main amd64 Packages
     8.0.33-0ubuntu0.22.04.2 500
        500 http://security.ubuntu.com/ubuntu jammy-security/main amd64 Packages
     8.0.28-0ubuntu4 500
        500 http://archive.ubuntu.com/ubuntu jammy/main amd64 Packages
 *** 5.7.22-1ubuntu17.10 1001
        100 /var/lib/dpkg/status
現在5.7.22が導入済で、アップグレードパッケージが用意されているが、Priority: 1001 が指定されているため、アップグレードの対象から除外されていることが分かる